Granny Cluster Coasters :: Free Pattern

Hello Friends,

This year I've been been making a conscious effort to purchase less new yarn for my crochet projects. So continuing in that vain, I'm excited to share with you another new project and pattern for two types of Granny Cluster Coasters - one round and one square. They are quick, easy and fun to make up, and of course, I had the yarn on hand. 


Supplies Required:

  • 4 - 5 balls of Bernat Handicrafter Cotton Yarn - this depends on how many coasters you wish to make and how many colour changes you wish to do. With 5 different colours of (5 balls of yarn) you could easily make 4 of each coaster, mixing and matching up all 5 colours
  • Size 5.0 mm crochet hook
  • Scissors 
  • Tapestry needle


Required Crochet Stitches:  

chain (ch)
slip stitch (sl st)
single crochet (sc)
half double crochet (hdc)
double crochet (dc) 
Note: All terms are U.S. 


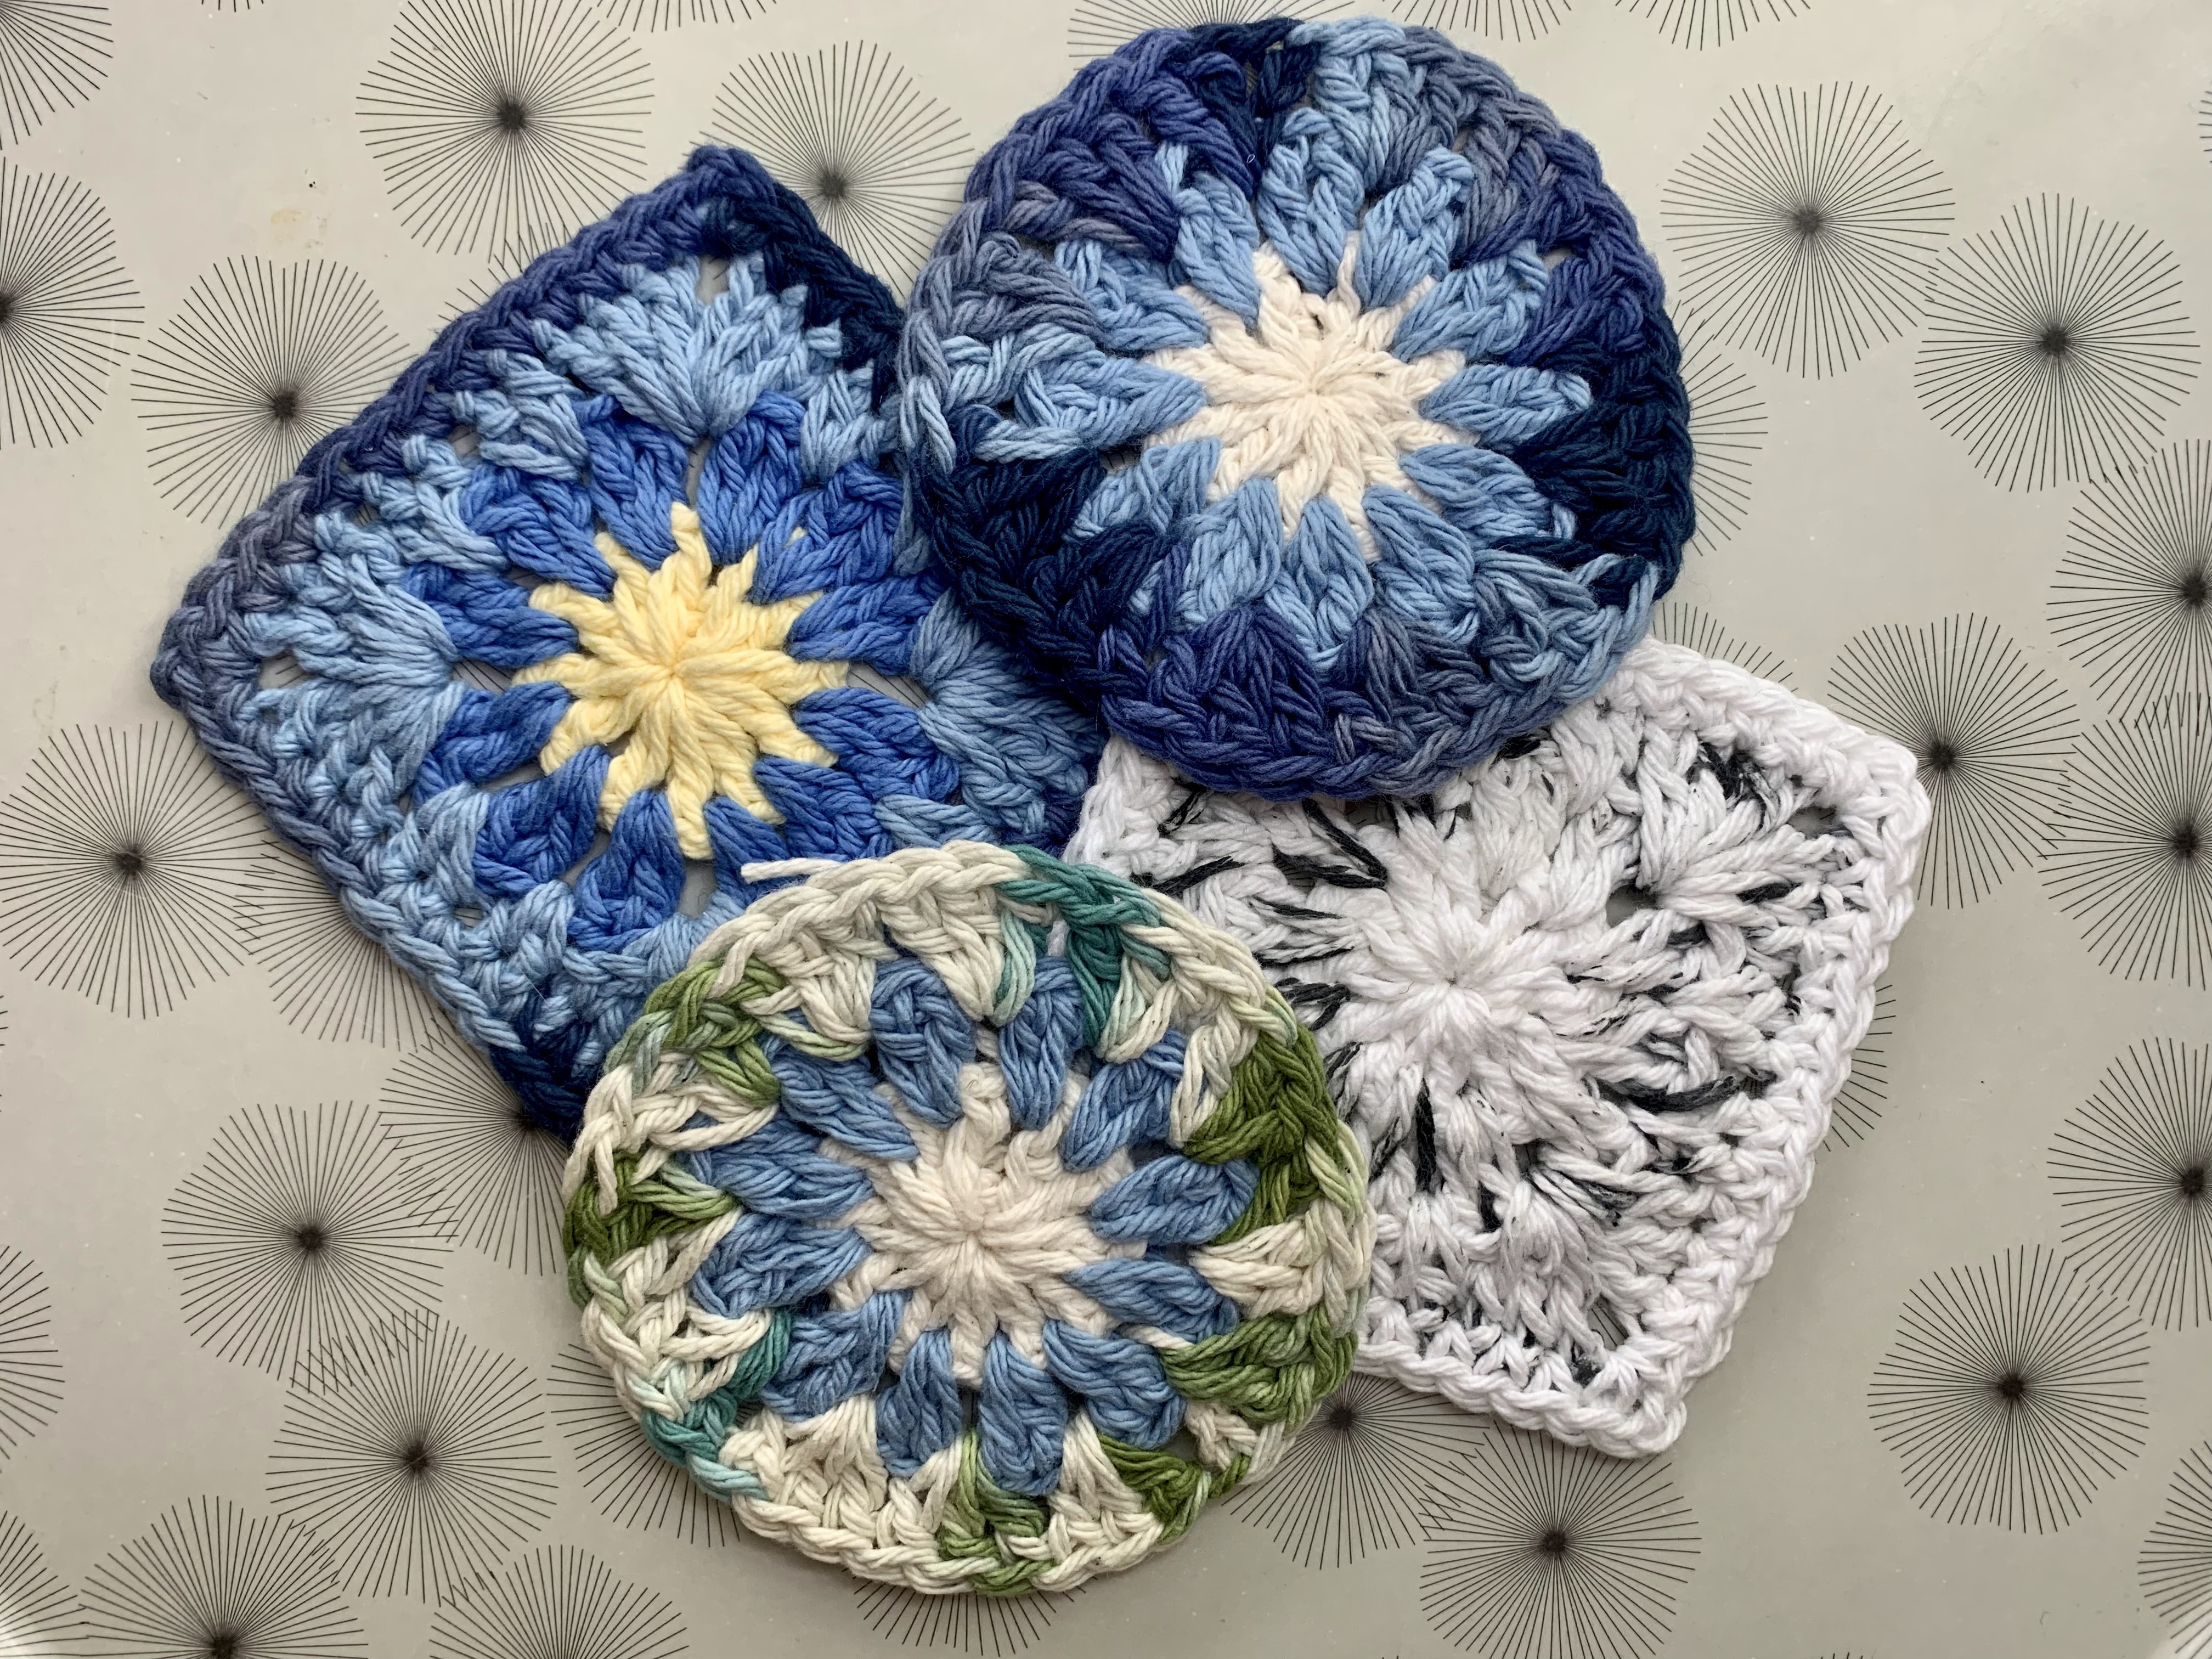
Please enjoy the free written pattern and video tutorial where I show you how to convert, or square off, the round coaster into the sqaure coaster. As always, thank you for stopping by!


Pattern Instructions (Round Coaster): 4" in diameter approx.

Ch 4 - join with sl st to 1st ch to make a ring, Ch 3 (counts as dc)


R 1: 11 dc into ring - 12 dc


R 2: join new colour in any sp btwn sts. Ch 3 (counts as dc), dc in same space. *2dc in next space. Repeat from * around, join with sl st to top of ch 3 - 24 dc


R3: join new colour in any sp btwn groups of dc. Ch3, 2 dc in same space, 3 dc in next space. Repeat around -  12  groups of 3 dc. Join with sl st to beginning ch 3.


Fasten off and weave in ends.


Pattern Instructions (Square Coaster): 4" x 4" approx.


Repeat Rounds 1 & 2 of Round Coaster


R 3: Join new colour in any space btwn sts. Ch 3 (counts as dc), 2 dc, ch 2, 3 dc in same space (corner made). 2 HDC in next 2 spaces on on side. In next sp make another corner, 2 HDC in next 2 spaces on on side. Follow around in pattern until you reach the beginning ch 3. Join with sl st to beginning ch 3.


Fasten off and weave in ends.


The Sweet Scalloped Bookmark - Quick and Easy Crochet Project

Hello Friends,

I'm so happy to share with you the most adorbale little crochet bookmark! I'm seriously addicted to making this bookmark - it's so quick and easy, plus it's beginner friendly. It makes a great gift for book lovers or book club and would be a nice addition to craft markets. You don't need much yarn or time for this project! Check out the FREE pattern and video tutorial below. Thank you for stopping by!


Supplies Required:

  • 1 ball of Cotlin Yarn, by Knit Picks or and DK/Light weight yarn works
  • Size 4.0 mm crochet hook
  • Scissors 
  • Tapestry needle 
  • Fork (for tassel)


Required Crochet Stitches:  chain (ch), single crochet (sc) Note: All terms are U.S. 

Pattern Instructions:

Ch 5, Join with sl st to first chain to form a circle


Row 1: Ch 1, 6 SC into circle, ch 4 and 1 SC into circle, turn

Row 2: 6 SC into ch 4 space from R1, ch 4 and 1 SC into same space, turn

Rows 3 - 18: Repeat Row 2 16 more times, or until you've reached desired length of bookmark

Last Row: 6 SC into ch 4 space, sl st into same space. Fasten off


Tassel (see video tutorial for visual): 

Cut 2 strips of yarn, approx 6" in length, set aside. Wind yarn around fork 13-15 times. Thread 1 strip of yarn (that we had set aside) through tapestry needle and thread in between threads of top of tassel. Tie a double knot at top of tassel. Gently remove tassel from fork and take the other strip of yarn and tie around the top of the bundle and tie a double knot. Cut the bottom loops of the tassel and trim ends to even bottom tassel off. Attach tassel to top of bookmark and weave in ends.


Crochet Stash Buster Blanket :: Free Pattern

 Hello Friends,

I'm so happy to share with you my lastest scrap yarn project: This crochet Stash Buster blanket is so easy to make, and it can be made at no cost simply by using what you have in your stash! This is the perfect project for using up any previously started balls of yarn and those tiny little pesky scraps that have been collecting over time. The stitch pattern is very easy and beginner friendly, it has a wonderful texture which makes the blanket incredibly cozy. The best part is that it's a totally unique blanket, and there are no ends to weave in!! 

Check out the video tutorial and written pattern below on how to make this gorgeous blanket:


Required Crochet Stitches:  chain (ch), single crochet (sc) Note: All terms are U.S. 

Finished Blanket Size: 50" wide x 56" long (approx. and without fringe)

You will need the following supplies:

  • leftover medium yarn - this project can easily be added to over time to achieve the desired blanket size
  • 8 mm crochet hook
  • measuring tape
  • scissors


Main Blanket:  This blanket is worked with 2 strands of medium weight yarn held together. You can make this any size you like, all you need to do is chain an even number of stitches to start.

Pattern Instructions:

CH 134,  

Foundation Row - Sc into the 4th ch from hook.  *Ch 1, skip next chsc into next ch*.  Repeat pattern across and turn.  

Row 1 - ch 2, (counts as first scch 1).  Skip first sc, *sc in next ch 1 spacech 1, skip next sc*.  Repeat pattern across, ending with 1 sc in last ch 1 space of turning ch, turn.  

Row 3 and beyond - Repeat row 1 until desired length
 
Border and Fringe - I did a simple sc border down the two length sides of the blanket and added a simple fringe to the top and bottom of the blanket.